How to Create a ZPL Label: Step-by-Step Tutorial
ZPLCraftUpdated September 30, 2026
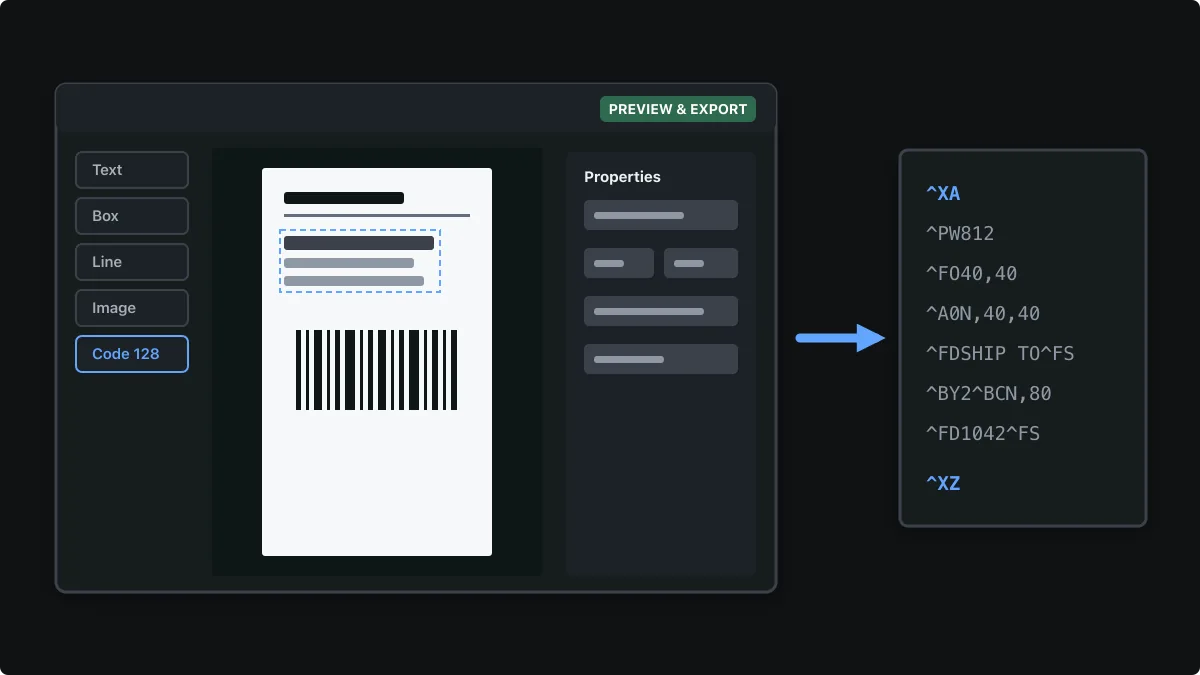
This tutorial walks through creating a complete ZPL label, a 4 × 6 inch shipping label, without writing a single line of ZPL. You set the label size, place text and a barcode on a true-to-size canvas, check a preview, and take the generated ZPL to your printer.
You can follow along in the designer without an account. Saving designs and printing need a free account, and exporting ZPL files is part of Pro. Open the label designer
Step 1: Start from a template or a blank label
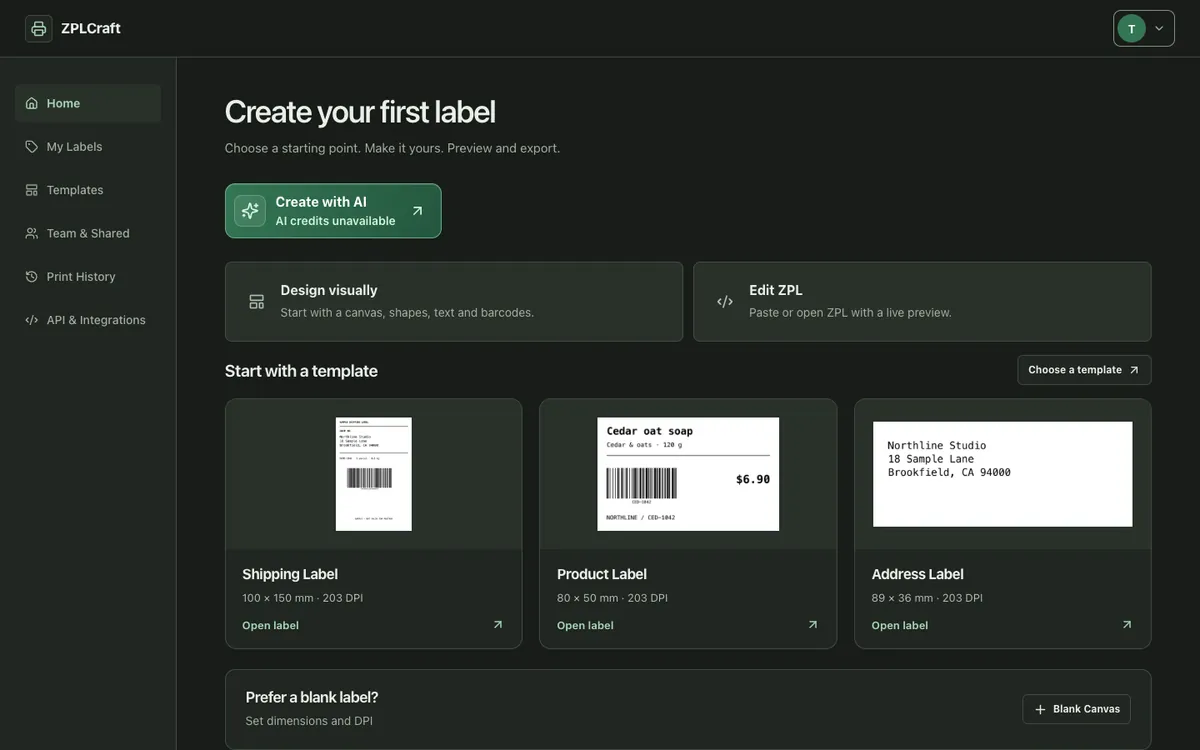
After signing in, the Home screen offers two ways in. Design visually opens the drag-and-drop canvas, and Edit ZPL opens the code editor with a live preview. Below them, ready-made templates such as Shipping Label, Product Label and Address Label give you a finished layout to adapt, and Blank Canvas starts from an empty label.
Step 2: Set the label size and printer DPI
Enter the width and height printed on your label roll, in millimetres or inches. Then choose the resolution of the printer that will print the label: 203 dpi for most desktop and shipping printers, 300 dpi for sharper small text, or 600 dpi for very fine print.
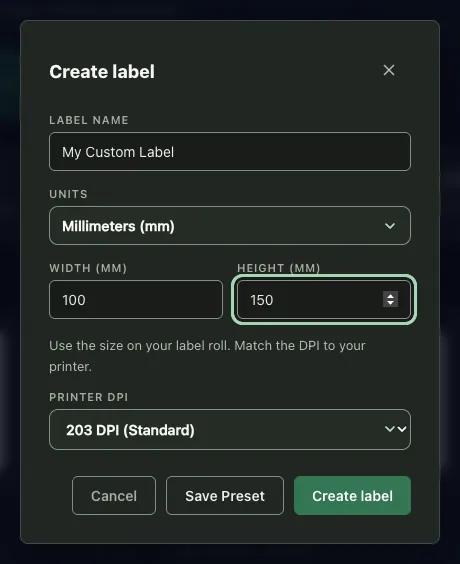
The resolution matters because ZPL positions and sizes everything in printer dots. A 4 × 6 inch label is 812 × 1218 dots at 203 dpi but 1200 × 1800 dots at 300 dpi, so the designer needs to know the target printer to generate the right numbers.
Step 3: Add and edit text
The Add Elements panel on the left places text, boxes, lines, circles, images and tables on the label. Click an element on the canvas to edit it in the Properties panel on the right: change the text, font size and font, alignment, letter spacing and line spacing. Multi-line text such as an address stays one element, so its lines move together.
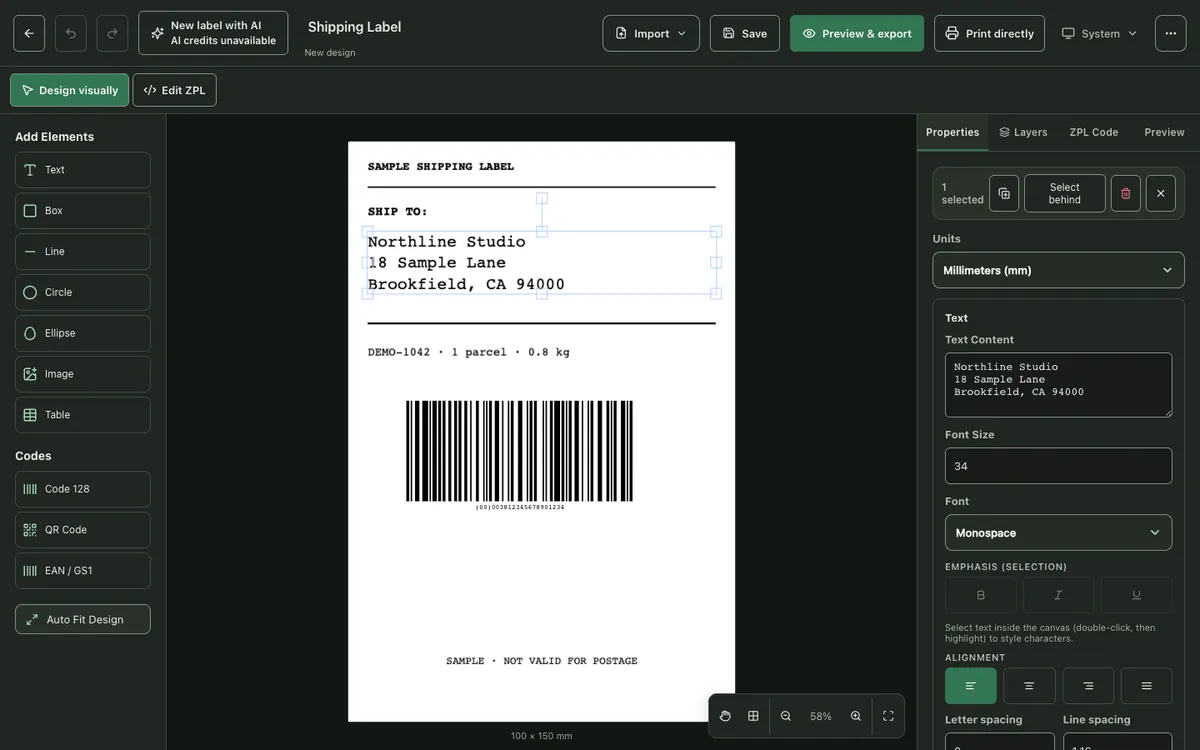
Drag elements to position them, or open Position & arrangement for exact coordinates. The canvas is drawn to scale, so what you see matches the proportions of the printed label.
Step 4: Add a barcode
Choose Code 128, QR Code or EAN / GS1 from the Codes section. Type the barcode content, then adjust the module width (the width of the narrowest bar, in printer dots) and bar height. Human-readable text under the barcode can be shown or hidden.
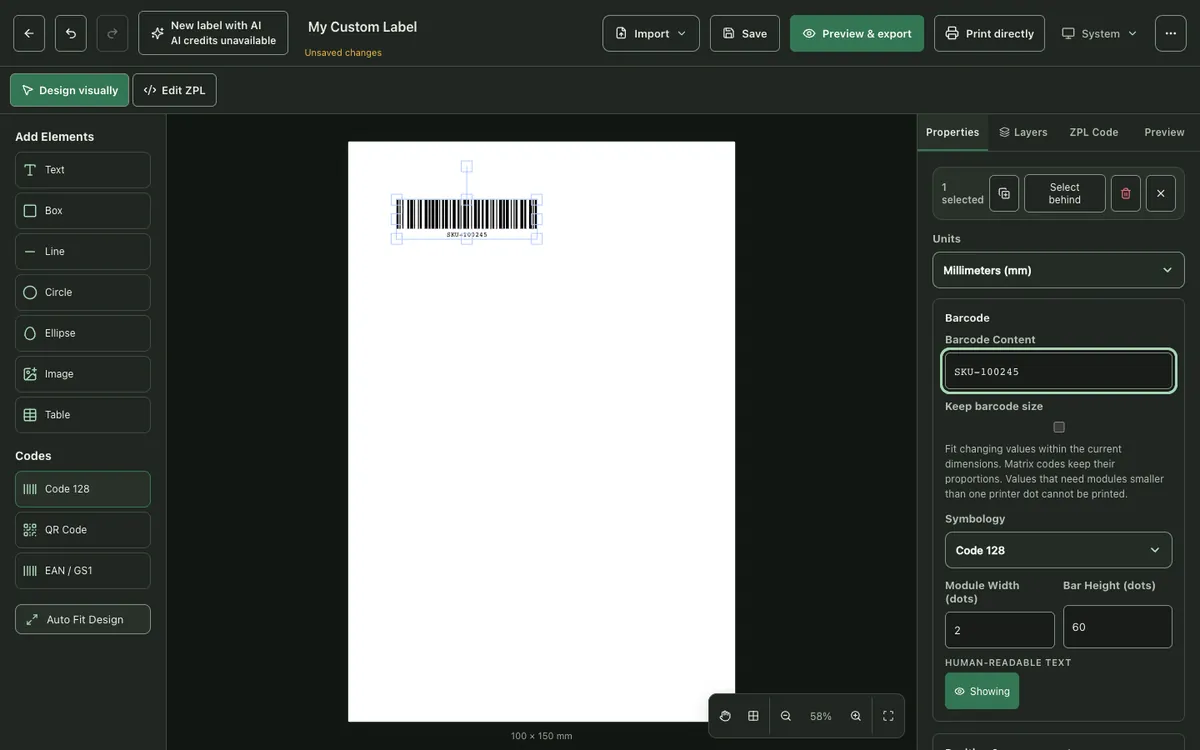
Barcodes are generated as native ZPL barcode commands, so the printer draws sharp bars at its own resolution. The barcode guide explains which symbology to choose and how to size it so it scans reliably. Read the ZPL barcodes guide
Step 5: Preview the label
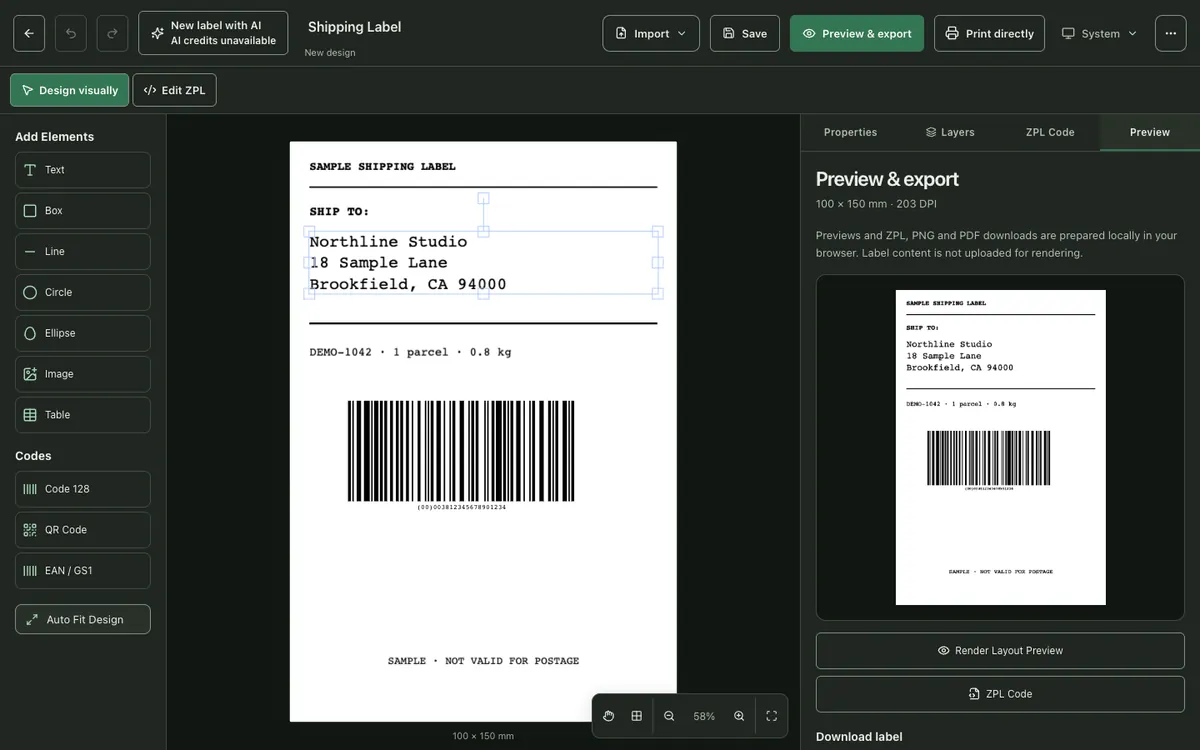
Open Preview & export and choose Render Layout Preview. The preview is rendered in your browser at the label’s real size and resolution, so you can spot text that runs off the edge or a barcode that is too small before you waste a label.
Step 6: Get the ZPL code or print
The ZPL Code tab shows the generated code. Print directly sends the label to a compatible printer from the browser, and free accounts include 10 prints a month. With Pro you can also copy the complete ZPL, download it as a .zpl file, or download a PNG or PDF from Preview & export.
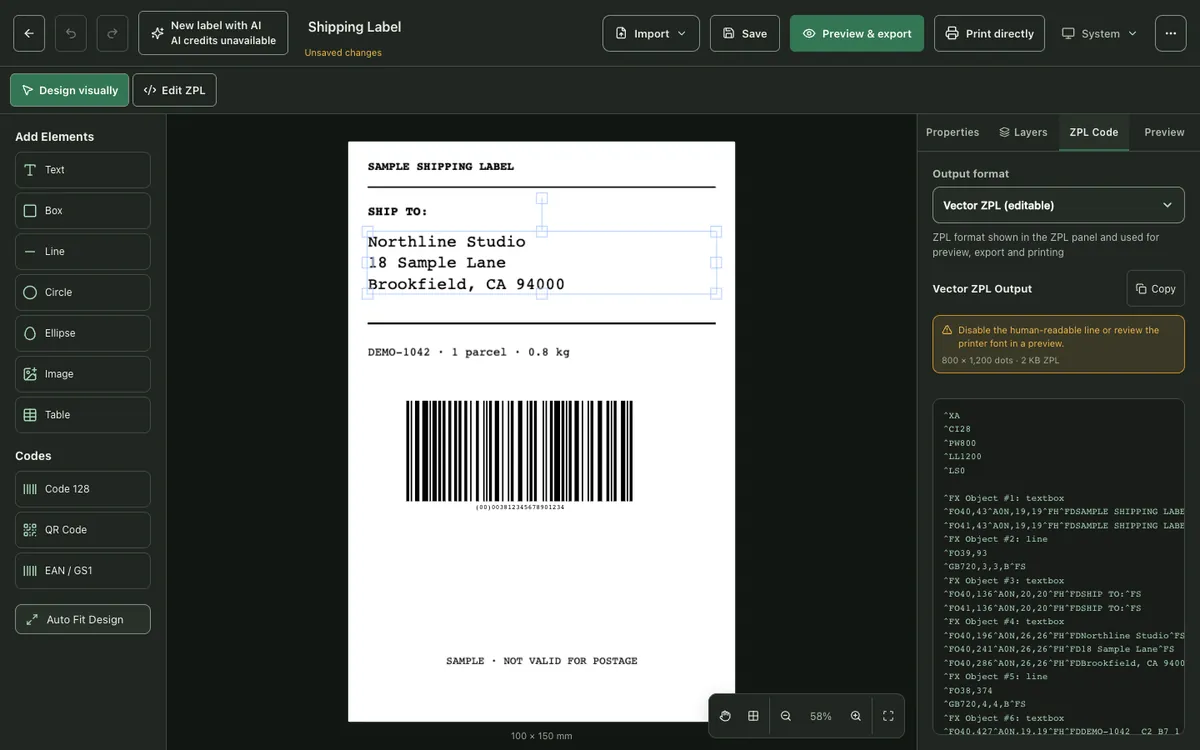
Choose the output format that suits your workflow:
- Vector ZPL (editable) uses native commands such as ^FO, ^A0 and ^BC. The file is small, stays readable, and can be edited by hand or by your own software.
- Bitmap ZPL (pixel-exact) sends the whole label as one ^GF graphic. It prints exactly like the preview, including any font, but the file is larger and the content can no longer be edited as text.
Where to go next
Once a single label works, you can print it straight from the browser, fill it from a spreadsheet to print hundreds of variations, or add your company logo.
- How to Print Zebra Labels from a Browser
- Print Labels from Excel or CSV on a Zebra Printer
- How to Add a Logo or Image to a ZPL Label (^GF)
ZPL label questions
Do I need to know ZPL to create a ZPL label?
No. You design the label visually and ZPLCraft generates the ZPL commands. You can still switch to Edit ZPL at any time to see or change the code directly.
Which DPI should I choose?
Use the resolution of the printer that will print the label. Most Zebra desktop and shipping printers are 203 dpi; many industrial and high-resolution models are 300 dpi. The printer’s spec sheet or configuration label lists it.
Is it free to create ZPL labels?
Designing is free and every account gets 10 real prints a month. Unlimited printing, ZPL, PNG and PDF exports and the complete ZPL output are part of Pro.
Can I open and edit an existing ZPL file?
Yes. Open it in the ZPL viewer or the Edit ZPL mode to change the code with a live preview, or switch to Design visually to edit supported elements on the canvas.